
I need to make some parts for my printer upgrade which will need to be strong so I thought it was about time that I tried some of the newer PETG filaments. As ever, these are just my personal experiences and I have no links with either eSun or E3D other than being a paying customer. Neither do I have any “axe to grind” or grudge against any company. What follows are just my own findings, on my machine and should not ne taken as any recommendation or otherwise.
I have for a long time wanted to try E3D’s Edge filament but the price has always put me off so I bought a couple of reels of eSun PETG from eBay. It cost me £51.48 for two 1kG reels, including postage and packing. This is quite a bit more than I normally pay for PLA but considerable less that E3Ds Edge. I was hopeful that the extra cost would be justified by the parts being stronger.
The reels arrived very well packed and each reel was inside a strong vacuum bag.
Before I go any further, I should remind readers that I use a Diamond hot end which has 3 inputs but a single nozzle. It is very important that all 3 inputs are loaded with filament at all times, otherwise the extruder pressure will simply force filament out of any unused inputs. However, buying 3 rolls of filament gets expensive when I only want to print a single colour, so what I do is pull off a couple of 5 or 10 metre lengths of filament. Then I load the main reel into one input (tool 0) and load the short lengths into each of the other inputs. For single colour printing, I still use the hot end as a mixing hot end but I define the tool (in this case tool 0) to use 98% of extruder 0 and 1% of extruders 1 and 2. This ensures there is always filament loaded into all the inputs, even though only one is mainly used. The 1% mixing ensures that the filament in the other two inputs is always kept moving (albeit very slowly) so that the extruder doesn’t keep grinding away at the same pat every time it retracts, and also the filament doesn’t get cooked by being heated for a long time without moving.
So, I loaded the filament as detailed above, (having first removed the previous PLA) then I selected tool 3 which uses all three inputs in the proportions 33:33:34 and extruded a further 300mm to ensure that it was completely purged through.
The first thing I like to do with any filament is print a simple tower about 20mm square by 100mm or so high. Then I vary the temperature every 10mm or so and observe the finish and how well it prints, looking out for any signs of under extrusion at lower temperatures.
eSun recommend using a temperature of between 230 and 250 degC so I started at 235 and went up from there. The first thing I noticed was that the filament started to ooze out of the nozzle at around 170 degrees C. Anyway, this is the result starting at 235 deg C on the left and increasing to 250 just before the break on the right.
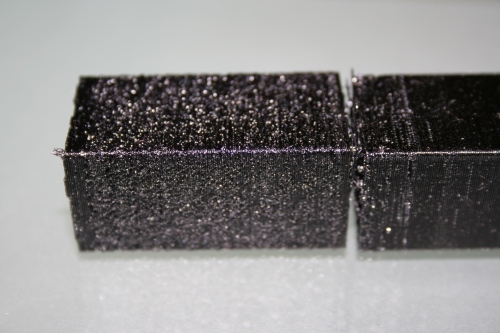
It was pretty awful as the picture shows. So I dropped the temperature down to 210 and carried on lowering the temperature down to 190 which significantly improved the finish. The next picture is the second half of the tower from 210 on the left to 190 on the right.
As well as the very poor finish, inter layer adhesion was appalling. That’s why the tower broke when I gently tried to remove it from the bed. In fact it broke in two places, the first was about 5mm up from the bed and not shown in the pictures.
So, I tried again this time starting at 180 and increasing to 210, then back to 190. This is the result.
I was very surprised to find that it printed at all at 180, but I think I could hear the odd skipped step from the extruder and there were signs of under extrusion. At 200 and above, the finish deteriorated remarkably and the inter layer adhesion was still appallingly bad at all temperatures.
So it seemed that for whatever reason, the optimum temperature to print this stuff, on my machine was around 190deg C. This is nothing like the 230 to 250 that I was expecting and in fact is the same temperature that I print PLA. So I started to wonder if I had a batch that had been wrongly labelled and contacted the seller.
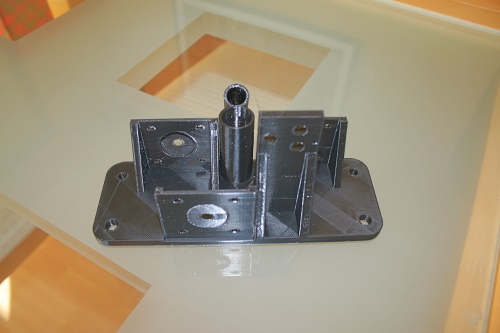
Meanwhile, having settle on a temperature of 190deg C, I decided to try and print something useful. This is the result
Sadly, although the surface finish was reasonable, there was just no strength to the part. It simply snapped very easily, far easier than I have ever experienced with cheap PLA.
At this point, the seller came back to me and asked that I supply a photograph of the labels so that he could contact the factory. Here is one of them.
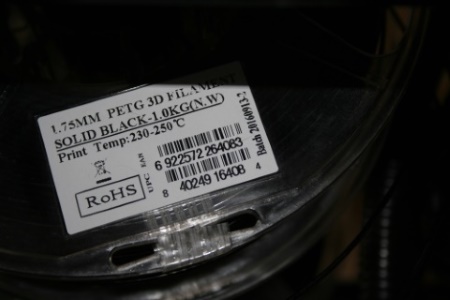
The seller later came back to say that the factories’ response was that “it is the right product” but also that it must be kept dry. I pointed out that I had removed it from it’s packaging, loaded it into my printer and started to use it within minutes so there had been no time for it to absorb moisture.
This is such a shame as I really hoped it would be a viable alternative to the more expensive “Edge” filament. The reality is that I can’t use it for anything due to the very poor inter layer adhesion and I’ll simply throw it all the bin.
In fairness to the seller, he did offer to refund my money which I accepted. I was however, a bit disappointed in the response he said that he has received from eSun. I was (and still am) willing to return it for analysis.
So, after that little episode, I still needed to find a strong filament so I “bit the bullet” and purchased some “Edge” filament from E3D online. I opted for the 2.3 kg which worked out a bit cheaper at £70. That doesn’t sound too bad but then there was £4.26 deliver and then VAT at 20% on top of everything at £14.85 making the total £89.11 (for 2.3kg). Which works out at about £38.74 per kg. Not cheap……
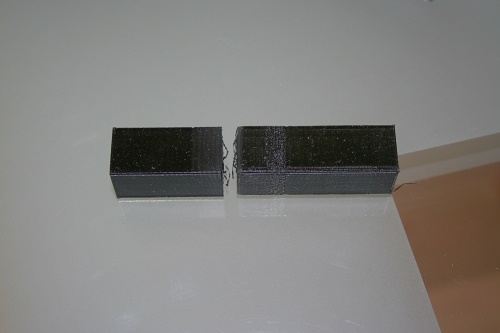
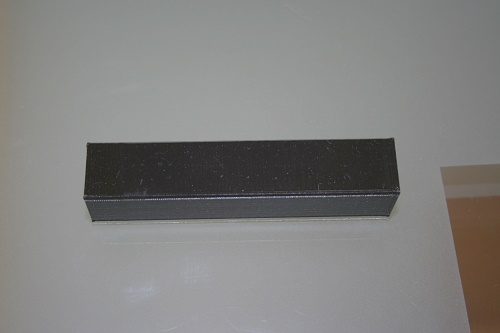
When it arrived, I was a little disappointed to find that it wasn’t in the strong vacuum bags that I have become used to. It was OK and there was some silica gel in the packaging but just a tad disappointing. What was lot disappoint was the reel that it was on. Look at it……

That’s it on the left, next to a “standard” 1kg reel. The inner hole is about 50mm diameter, then there are those huge webs taking it to 210mm before any filament gets wound onto it! The outer diameter is about 300mm. A “standard” 1kg reel would fit inside the wasted space so the whole thing could have been half the size. It’s not the waste of packaging that irks me, it’s how the hell do I fit that monster on my machine? In the end, I had to wind it from the monstrous great spool onto an empty “normal” size spool. Now 1kg of 1.75mm filament is about 300 metres and believe me, winding that from one spool onto another is a real PITA. The moral of the story? Don’t buy the 2.3 kg option – pay the extra and buy 3 normal (0,75kg) size reels instead (that’s assuming they come on sensible size spools).
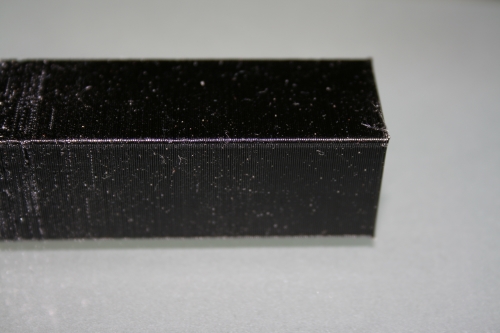
OK, winge over. So I loaded up as before and again, I started with tower 20mm x 20mm x 100mm varying the temperature every 10mm. I started at 235 deg C, increased it to 250 then went down to 190. Observing the print quality all the time. Here result.
The camera doesn’t show the differences which are very subtle. Basically, I found this stuff printed well at just about any temperature. I did notice skipped steps and signs of under extrusion from 200 and below but anything above that, it was hard to see any visible difference in this test cube piece. What I did notice is that it started to ooze at about 180 as the nozzle was heating up.
The part is really strong too. It’s only 20% infill but I can’t break it with my hands – I’d need a vice and hammer.
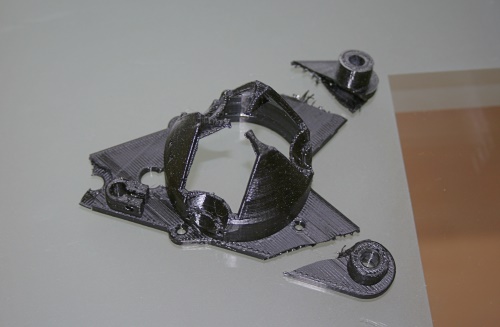
As this stuff is expensive (to me anyway), I decided not to bother doing any more test pieces to refine retraction or any other parameters but went straight on to print some parts using the (every day) settings I use for PLA. My rationale being that I might end up with something that would be functional but not necessarily pretty and I can refine the parameters “on the fly”. So here is the first printed part
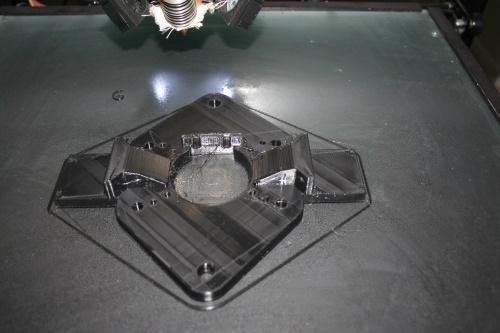
Two things I noticed. The first was that it was a bit stringy and I’d need more retraction. The second was that the filament has quite an affinity for sticking to the nozzle. What tended to happen was that I’d get a bit of a build up around the nozzle, especially when doing small detailed moves, which would later fall off and leave a stringy blob. I believe a silicone sock might help but as no one sells one to suit a Diamond hot end, I’ll have to look at making my own.
What was impressive was the hollow fan ducts (the two raised parts in the picture). I printed these without any support just for the hell of it. Here is a close up.
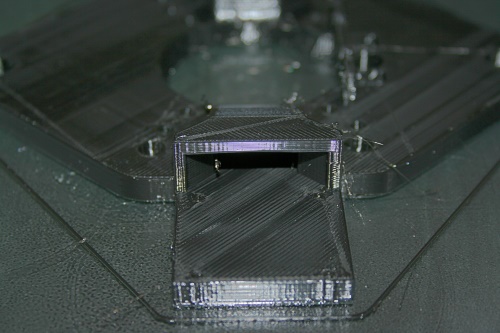
That’s an unsupported span of 31mm from left to right. That kind of bridging capability opens up a whole new world of possibilities for me.
During the first print, I did play around with temperature and retraction settings. I found that I need about 50% more retraction than I’m used to with PLA. I have shortish Bowden tubes (about 250mm) and use firmware retraction because I need to retract all three filaments simultaneously and was using 2mm but with Edge I need about 3mm. Also, a faster retraction speed seemed to help too. An added benefit of using firmware retraction is that one can change the parameters “on the fly”. Also, I found that lowering the temperature seemed to help with the build up around the nozzle and blobs as did lowering the extrusion multiplier to 0.95 from 1.00
Anyway, this was the second print with a bit more retraction and the temperature lowered to 210 deg C. I know this is 10 degrees less that E3D recommend but it seems to work well for me on my machine.
Close inspection shows it’s a bit “hairy” here and there and the top layer surface finish could be improved but the results are very promising. The holes, both horizontal and vertical are nice and circular. The parts are also very strong, which was the original criteria that I hoped PETG would meet. I’ll keep playing around with settings to get this “dialled in” properly but so far, the results are very encouraging.
So, I’ll happily use E3D edge but only for parts that need to be robust due to the high cost. Sadly, I’ll not be using eSun PETG for anything due to the very poor inter layer adhesion that I encountered.

Odd about the PETG, I have some blue RoHS stuff that was my first PETG effort and have it working well – don’t bin it, I will happily pay UK postage! I am amazed that you can move it at all at 190 though, it was the PETG that got me investing in a geared (5:1) stepper motor for mine. Maybe you’re underextruding at all temperatures? Layer adhesion is usually a major plus for PETG, but it it definitely oozes and strings.
Have a look at volumetric controls on slicing. I started from http://forum.seemecnc.com/viewtopic.php?f=36&t=7361 point #9 (seriously tough to parse the steps but can work it out), and then there’s more if you search around. The basic idea is to calibrate your filament on your system by working out the lowest temperature and highest speed that you can reliably extrude a fixed length of filament. From this you can work out a maximum mm^3/sec rate – plug this into Slic3r for example, set all your speeds to ‘auto’ and job done. Now I am printing at much faster speeds overall and don’t print the towers anymore. The key is that this is a hard limit for printing a given filament, so given a rigid build like v-slot there should not be much other reason to slow the print speed.
That Edge bridging is stunning (just like the price :-)).
LikeLike
Thanks for the feedback but I do know what I’m doing. The Edge filament works fine and I’ve also had good results with Taulman T glass (also very expensive). It’s definitely not under extrusion with this eSun stuff. As you say, it’s amazing that it will extrude at 190. In fact, I can go as low as 170 with this eSun stuff and while I do start to get a few skipped steps and definite under extrusion at those low temperatures, it does move. So my conclusion is that there is definitely something wrong with it – maybe it’s just a bad batch? You can have it with pleasure. I’ll pm you.
LikeLike
Thanks Ian! Shame I couldn’t make it work either :-(. I managed to get the layers to stick together at least for small parts, but that low temperature oozing takes ‘stringing’ to a whole new level – more like ‘walling’, as I actually have new walls in my test parts at the seams. The rough surface is annoying too, but at least I’m able to make parts that can be whittled down to what they’re supposed to be and/or get enough to check my models in the real world without using my good filament. I’m happy to have it as surplus until I can afford to work only in Edge, but glad I did not buy it. Keep blogging, you’re doing great work and really useful here to feed off your ideas.
LikeLike
Edit. E3D Edge is PETG (but this one works), Taulman TGlass is PETT.
LikeLike
Your esun PETG was wet. That finish, is the classic sign of wet PETG. Edge will do that if left out. You can bake it in the oven at 70-80C (160-180F) for a few hours, and get MUCH better prints out of it. Then keep it in a dry box with silica gel.
LikeLike
Yes we know that. The point is, it was brand new, taken straight out if the vacuum packaging and placed on the printer. A new print was started within 30 minutes of taking it out of the packaging. If you read the comments above, you’ll see that I’ve since given it to someone who follows this blog and he has been trying all sorts of ways to dry it but with only limited success. BTW, I’ve been have great success with this stuff http://shop.3dfilaprint.com/filaprint-pet-g-393-c.asp. Personally, I’ll not be buying any E-sun filament again – I suspect they immerse it in water for several days before they vacuum pack it 🙂
LikeLike