

I’m not sure if that’s the correct term for these things but a Google search brings them up. My wife and I have seen some amazing examples of these things in German Christmas shops. They can have pretty amazing price tags too!
Traditionally, they are made of wood and decoratively painted. There is a central shaft connected to the “windmill” at the top and each tier has a disc connected to that same shaft. The warm air rising from the candles causes the “windmill” to rotate which in turn makes all the disc rotate. Small figures representing the nativity scene and such like are placed on the revolving discs.
Quite a few yeas ago, I started to make one but I never got very far with it and have recently just sold my wood turning lathe to make some space. As I was clearing out my garage I came across the part made wooden version which gave me the idea of printing one. Obviously, I’ll need to break away from tradition as plastic blades with naked candle flames could be a bit hazardous. So this one will be driven by a motor and the “candles” will be plastic with LEDs instead of flames.
The featured image at the top of this post shows the OpenScad design as far as I’ve got today (3rd April 2018). I’ll be using my diamond hot end to print many of the different coloured parts in situ. This a picture of the base section as far as I’ve got with it.

The bottom will be white as will the support pillars, the sides will be be red with horizontal gold stripes. So I’ll need to switch between white, red and gold filaments when I come to print it. The grey parts are the motor and pulleys which obviously don’t get printed. The black part represents at 8mm threaded rod that goes all the way up to the “windmill”. The base is an eight sided circle (OK it’s an Octagon but that’s the best way of making an Octagon in OpenScad), and is 350mm Diameter so will just fit on my print bed with a bit of room to spare. The total height will be a tad over 700mm
I’m trying to design it so that it can be taken apart for storage. So there is no glue involved.
Here is a representation of the base with the candle holders fitted. 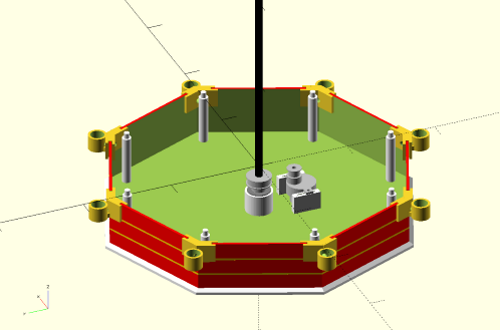
I could possibly have printed them in situ but I’d need to use supports. More importantly, it wouldn’t fit on my print bed so I had to design them as separate parts which will (hopefully) just slot in place.
I’ve made a start on printing some of the parts. Here is the topmost layer.
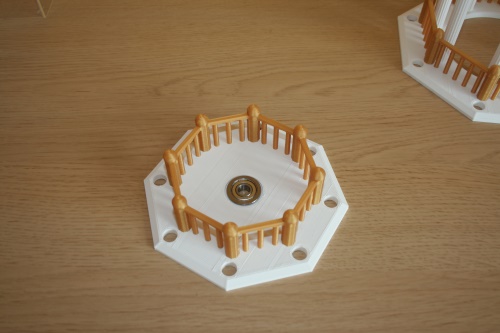
It’s 150 mm diameter (across the points). The gold (coloured – not real gold) rails were printed at the same time, so they are part of the whole, because it’s easy enough to do and saves having to glue them on separately. You can see the upper 8mm bearing which sits in a recess in the printed part. This will support the top of the threaded rod. Oh, by the way, the rod doesn’t need to be threaded but I found it was cheaper than smooth rod. Maybe I could have used bar stock but that’s difficult to get hold of in shortish lengths (700mm). Also the threaded rod will be BZP (Bright Zinc Plated) so it won’t rust easily and the threads will give the grub screws that hold the central discs something to bite into too.
Anyway, here is next section
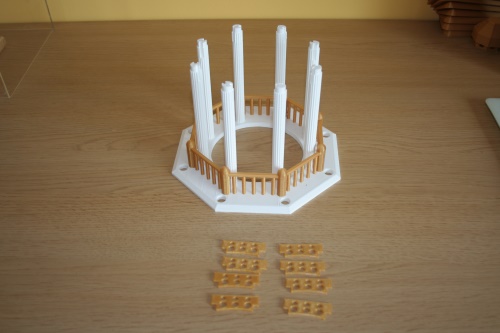
The camera angle makes it look like the pillars aren’t upright but in fact, they are. The bits at the front (difficult to see against the wooden top) are valances which had to be printed separately. I’ve printed some pretty big bridges but that’s a step too far. The “handrails” bridged across the vertical spindles OK.
The main part with white pillars and gold rails was all printed as one part. So lots of tool changes between white and gold. I used my “purge bucket” technique with this particular print. This piece is 200mm diameter and the pillars are about 120mm tall. It took 19 hours to print.
So here is how it looks with the valances fitted.
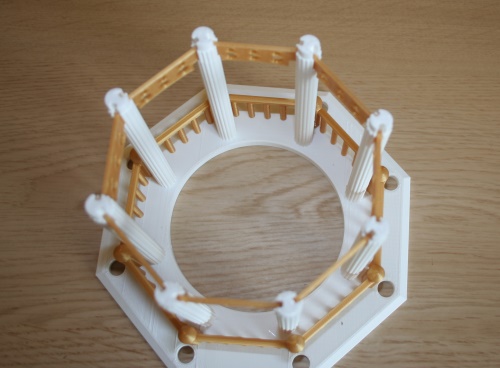
Again, it’s a bad camera angle but you can just about make out that the pillars have slots so the valances just slide in from the the top.
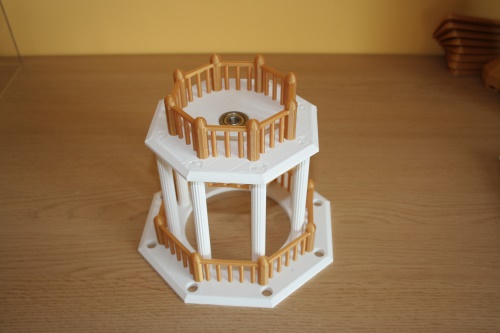
Here are the two section fitted together.
These are the parts that make the “windmill……..

……….and these are the blades fitted into the holder

The blades were printed flat with the rectangular part that fits the holder printed at an angle of 15 degree to the vertical, so that when they are fitted, they are angled. I have no idea if 15 degrees would the optimum angle, but it looks about right. This next picture show the cap that holds all the blades in place.

It just has an octagonal hole that fits over the blade ends and holder.
Here is the shaft on which the windmill will sit.
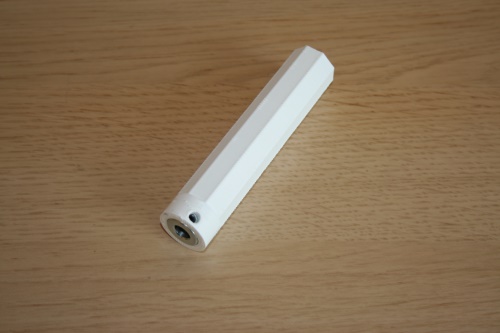
There is a steel locking collar inserted into the base which will be held in place by a grub screw. The inner discs will have a similar arrangement. I’m planning on using overly long grub screws that will protrude out into the hole in the side of the plastic part, so that it will rotate together with the inner shaft. If that doesn’t work, I’ll just glue the steel locking collar into the plastic part.
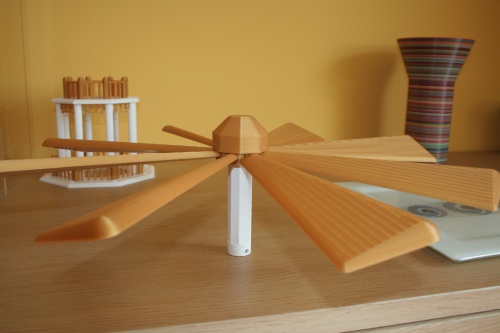
Here is the complete windmill assembly.
That’s about as far as I’ve got so far. I still have to design the candles (I’d like to simulate wax running down the side if possible) and one or two other bits and pieces. I need to sort out how best to wire the LED candles so that they can easily be removed and put back on. Some sort of plug in arrangement needed. Possibly prototyping plug board might work…..
What I don’t know is if the geared motor I bought will be powerful enough to drive it. The gearing seems to give it plenty of torque so hopefully….
Neither do I know if the speed will be too fast or two slow. It looked a bit fast when I tested it so I went with a 40 tooth pulley on the shaft and a 20 tooth pulley on the motor which will halve the speed again. I’ll just have to try it and see. I’m planning on powering the entire thing with a plug type 12v supply. I’ll design the base to take a circular jack socket that the power supply can plug in to and I’ll maybe fit switches for the motor and or candles.
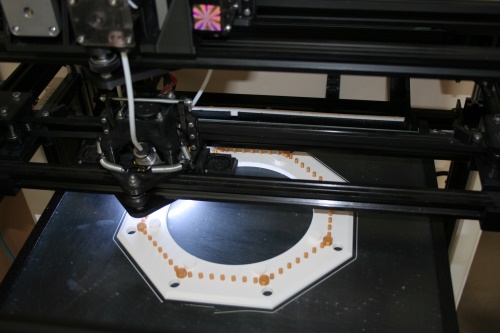
As I write this I’m printing the next layer down (250mm diameter). 5 hours in but about 20 hours to go ……………
More to follow………..
Ian

Cool project, that brings back some fond memories of my childhood in germany.
Not counting when I burned down a little version of these. :]
LikeLike
You’re not alone with breaking these (While you burned one, I broke two while playing helicopter with these =] )
LikeLike
Ha ha. It seems that avoiding naked flames is the right thing to do. Hopefully when it’s finished, this thing will be too big to tempt anyone to use it as a helicopter. 🙂
LikeLike