
Following on from my post on printing multi coloured objects without using wipe or priming towers, people have asked “how do you get the gcode file to start with?.”
This is the way that I do it. There is nothing ground breaking here and it’s all well documented but this post might help by pulling it all together.
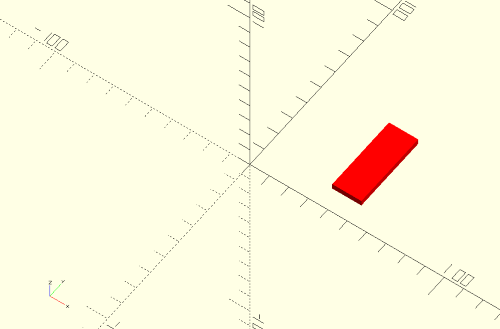
I use OpenScad to generate the .stl files and Slic3r to pull them all together. So, starting with the design, I’ve found it best to create separate modules for each coloured part. Below is the OpenScad code for a simple test piece that I designed to help me find the optimum purge setting to use in the post processing script.
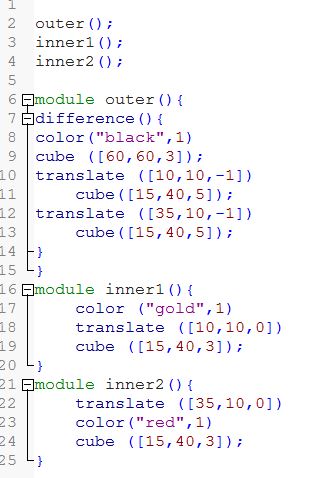
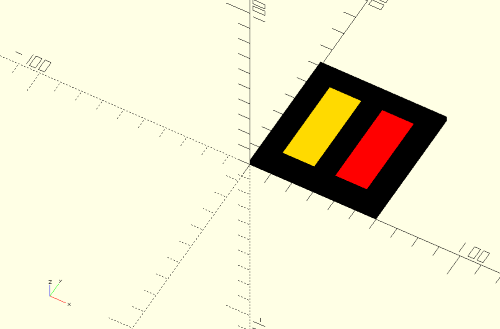
This picture shows what all 3 parts look like.
By commenting out two of the modules like this …..
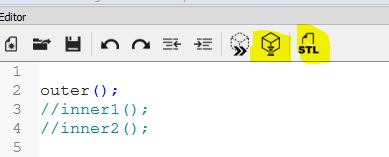
… it’ll leave just a single module. In this case the outer part only.
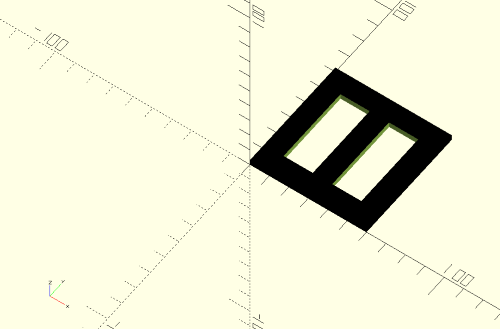
Then hit render (the left of the two highlighted buttons above) and once it has finished rendering, hit the export stl button (the other highlighted one) and give it a name like “myThingBlackPart.stl” or some such.
Do the same for the other parts e.g.
Hit Render then export stl with a unique name like “MyThingRedPart.stl” and you’ll have the 3 separate stl files.
The next thing is to load them into Slic3r. So add the first part to the plate like this
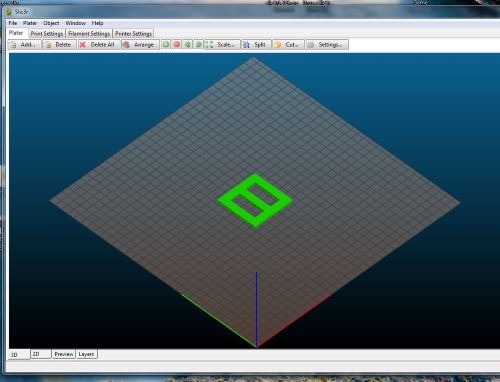
Then make sure the part is highlighted (click on it to select – it should show as Green on the build plate, if it’s Yellow, it isn’t selected). Then click on “Object” and then “Settings” which will look like this (without the highlights)
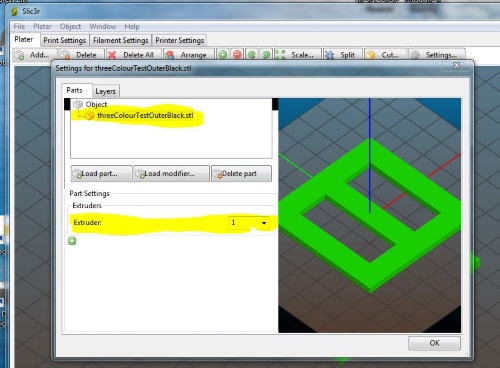
You’ll notice that a tree has started to form with “Object” being the main part and the part we have loaded being the first branch. Click on this branch as denoted by the highlight, then use the drop down to select the Extruder to assign to this part – in this case number 1.
If you don’t see a drop list of extruders, you need to tell Slic3r that you have multiple extruders which you will find under the “Printer Settings” tab.
Note also that in Slic3R the first extruder is referred to as extruder 1 and that your firmware may use a different numbering system such that the first extruder is 0. I believe the latest version of Duet firmware will allow me to “re-map” the extruder numbering so that it’s the same as Slic3R but I’ve become accustomed to using 1,2 and 3 in Slic3R and relating these to 0,1 and 2 on my machine.
So while we are in this screen, we can now press “Load part” and select the next stl to load. If you forget and close this screen, don’t worry. Just click on “Object” again, and then “settings”.
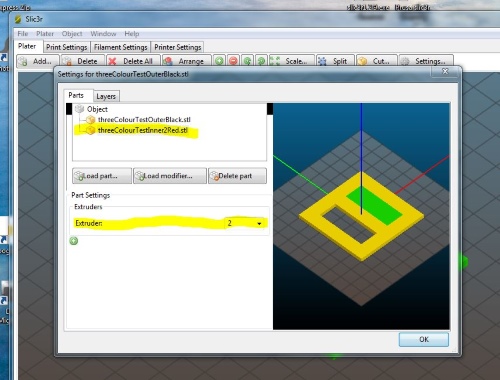
Now select this second part from the tree as highlighted and set the extruder to use for this part (in this case Extruder 2).
Click load part again and repeat for the third part (if thee is one). I find it’s a good idea to click through the “tree” and double check that each part is assigned to the correct extruder. Note that the “Object” itself can have an extruder assigned to it. I’m not sure why and tend to leave it as “default”.
So, once you are happy that all the parts have the correct extruders assigned to them, hit “OK” and slice\export gcode as normal. Slic3R will insert “tool” (Tn) commands in the gcode file at all the points where a new colour (Extruder) is needed.
Hope that helps.
Ian
