

This was my original method for holding filament
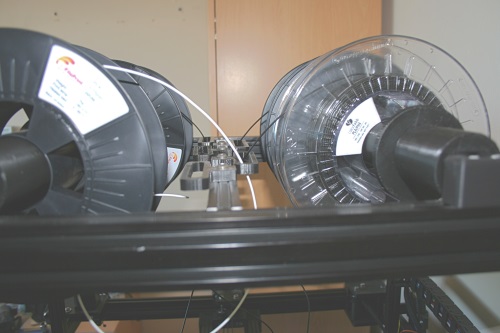
Essentially two lengths of 2020 vslot extrusion spanning the width of the printer. Cylindrical adaptors (printed parts) of about 45mm diameter with a square hole right through the middle and with flanges at one end, were slid over the rods. Filament was loaded by sliding the reels over these cylinders. Most filament reels I’ve bought have had a hole about 53mm diameter so they were a loose fit but rotated reasonably easy. I have had the odd reel with a smaller inside diameter but managed to install it by removing the cylindrical adaptor – not ideal.
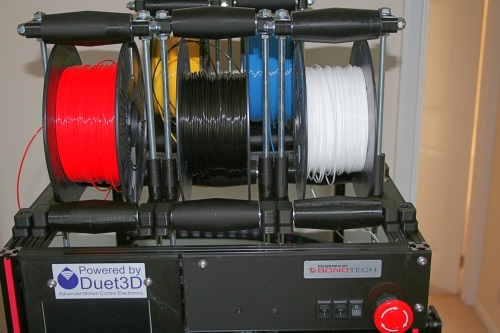
When I’m using the 5 colour Diamond hot end, I have three reels on the front, and two on the back. Loading filament wasn’t the easiest thing to do, especially if I wanted to change the middle one of the three, as it involved sliding one of the other reels off the rod, “balancing” it somewhere, changing the centre reel, then re-fitting the end one. It usually resulted in my dropping a loaded reel of filament and having the rewind it, or in some cases dropping the entire assembly onto the glass build plate (it never ceases to amaze me just how much abuse 6mm thick glass will take).
However the main problem was filament getting tangled around the shaft. My bed size is 400mm x 400mm so when homing the printer or printing near a corner, it pulls off around 200 plus mm of filament. Then, when the head moves back to the centre of the bed this 200mm of filament has to go somewhere so often got pushed upwards. If I had just fitted a new reel of filament this amount of slack wouldn’t go back on the reel so sort of fell off the side. From then on, it would wrap itself around the shaft, get more and more tangled and eventually, if I wasn’t around to keep an eye on it, would get pulled tight and cause all sorts of breakages and problems. I’ve lost a few prints this way – usually big ones that had to run over night.
So I decided it was time to do something about it. I got my inspiration from this post on the RepRap forums by Mark Rehorst aka “the_digital_dentist”
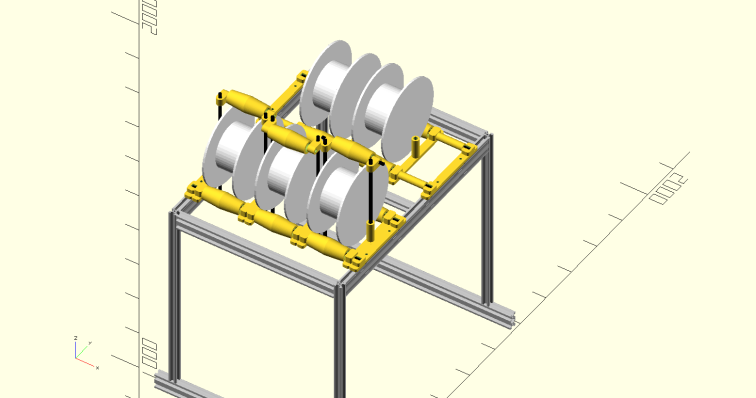
The digital_dentists spool holder
Essentially, having a roller on top of the filament prevents it from jumping off the side. In my case, in need 5 of them which would be an awful lot of plastic so I decided to use a lot of steel rod instead. Here is the concept in OpenScad. The yellow parts are all printed.
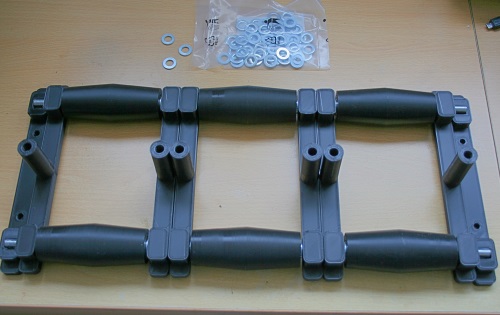
These are all the parts that make up the holder for the front 3 reels of filaments – oh and a lot of washers which aren’t shown.
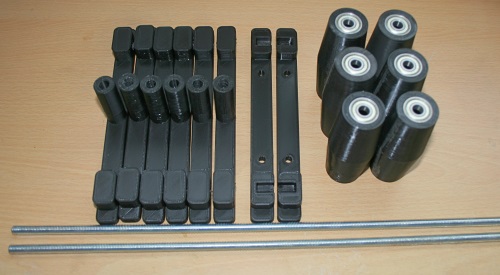
Essentially two 8mm diameter rods which span the width of the printer and on which the rollers are fitted. I need to digress at this point. To make a threaded rod, one must start with a smooth rod then run a die or thread forming tool down the length to cut the thread. This obviously takes time and should add cost. So why is it that wherever I look, threaded rod is cheaper than the smooth round stuff they make it out of to start with? Anyway, that’s the only reason I chose to use threaded rod rather than smooth – it was lot cheaper and I don’t need any sort of accuracy for this application.
There are two end parts (one for each end) that bolt to the frame. The horizontal rods just drop into these end parts. The rest of the parts slide onto these rods – the following pictures will explain…
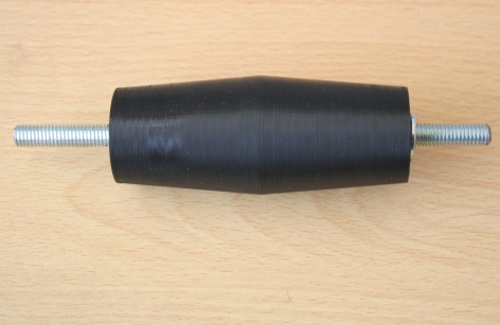
So here is a printed roller and the bearings that were pressed into it. They are just 608 bearings, 8mmID, 22mmOD, 7mm long – Skateboard bearings from Ebay were nice and cheap (I needed 30 of them).
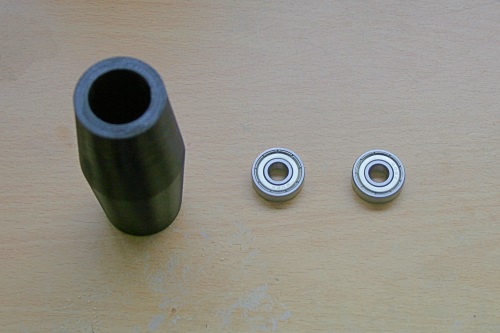
This will be a top roller but all 15 were identical. Here it is with bearings, short rod and washers. The rollers are tapered to keep the filament reel centred.
Next are the printed parts that will take the vertical rods. These are held on with Nyloc nuts (not too tight otherwise the roller wouldn’t “roll”).
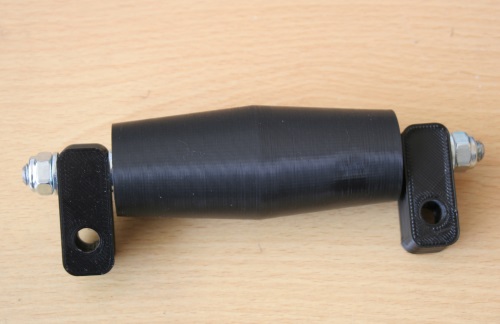
Finally, the vertical rods are fitted making a complete upper roller assembly …….
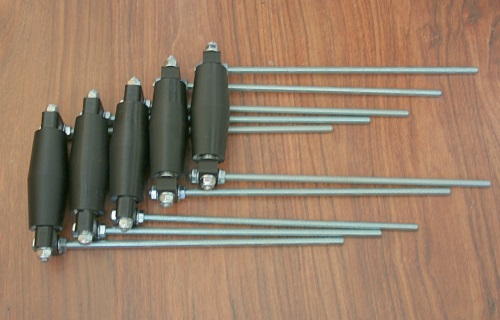
…..and here is all 5 of them.
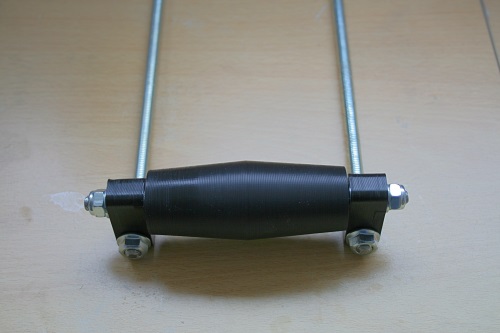
This is the complete assembly for the 3 front reels of filament.
From left to right it’s mount, vertical rod holder, washer, roller, washer, 2 vertical rod holders, washer, roller, washer etc etc. The mounts are later bolted to the printer frame and the rest of it just drops in place. The assembly for the filaments at the rear of the printer is the same except that it has only two sets of rollers with spacers at either end of the long rods to keep them in place.
One thing I didn’t mention is that I have these printed filament guides on a central rail which just prevents the filament from pulling sideways off the reel when the print head is at extreme axis limits. These were on the original setup and are re-used for this new arrangement.
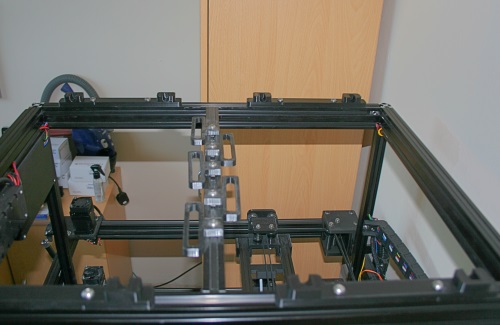
So here is both front and back sets of rollers fitted to the machine….
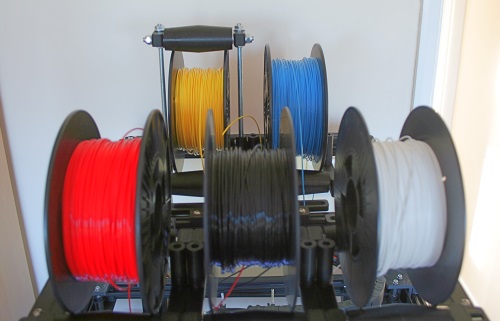
…..and here are 5 reels of filament fitted, with one of the upper rollers on the yellow reel at the back. The reels just sit on the rollers, then the upper roller just drops into the guides on the printed parts. I had considered using nuts and coil springs on the underside of the rods to keep the rollers in contact with the top of the reel but discovered that gravity does that job for me and makes changing filament much quicker. The vertical rods are over long (about 300 mm in length) so as to accommodate large (or small) reels. The roller length is about 96 mm so that would be the largest width of reel that I could fit, but narrower ones are no problem and automatically get centred due to the tapered rollers.
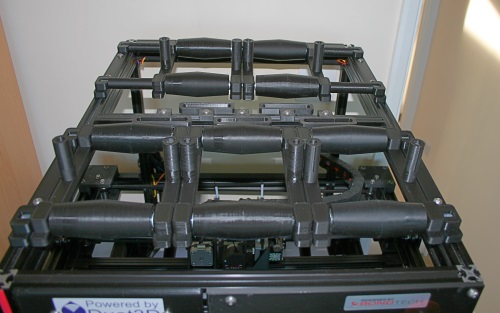
This last picture shows all 5 reels fitted, complete with the upper rollers. The upper centre roller is rotated 180 degrees compared to the 2 outer ones so that the nuts holding the horizontal shafts (lets call then axels) don’t interfere with each other.
Note that I hadn’t loaded filament into the hot end – just pulled about 300mm out of each reel to check that it wouldn’t come off the side when pushed back. It works like a charm and the reels rotate really easily – I’m well pleased with how it turned out
So that’s one problem cured. More upgrades to follow very soon………
Ian

Hi, very nice update/design!
Is this uploaded/shared somewhere?
If not, can it be? 😛
Thanks!
LikeLike
Thanks. It isn’t uploaded as I thought it was a bit unique to my printer. I can let you have the files though. What would you like, the original OpenScad files (then you could adapt it to suit) or stls? I can upload them to my google drive and let you have a shareable link.
LikeLike
The OpenScad would be great, I would try to adapt on my CR-10S(framed) and 3 color diamond hotend, thanks!
LikeLike
Give me a day or two and I’ll get that done.
LikeLike
Sure, thanks!
LikeLike
Hi. I’m so sorry but I can’t find any files related to this filament holder. I seem to have lost the lot – the OpenScad files, the stl files and the gcode files. I had a major PC failure around that time and ended up scrapping that PC and building another but I’m usually pretty good at backing everything up. I’ve got all my OpenScad files going back to around 2015 and up to around May 2018 and from July 2018 to present. It seems to be everything around late May/June that’s missing. The only thing I can think of is that it for some reason, I must have put all the files in folder that was in a location that didn’t get backed up. I’ve checked my NAS and gone back through numerous backup versions, but I’m dammed if I can find these files anywhere. This is really annoying. I’ll keep searching and get back to you if I manage to find them somewhere but I’m not hopeful.
LikeLike